Account & Settings
Setting up carton labels
How to set up the carton labels Crown prints for your shipping cases: label stock size, best-before date format, optional rows, and your brand logo.
A carton label is the case marking Crown prints for a batch: the product name, case barcode, lot code, best-before date, and case details, sized to the label stock in your printer. You set the layout once in your company settings, and every label you print from a batch follows it.
Where to set it
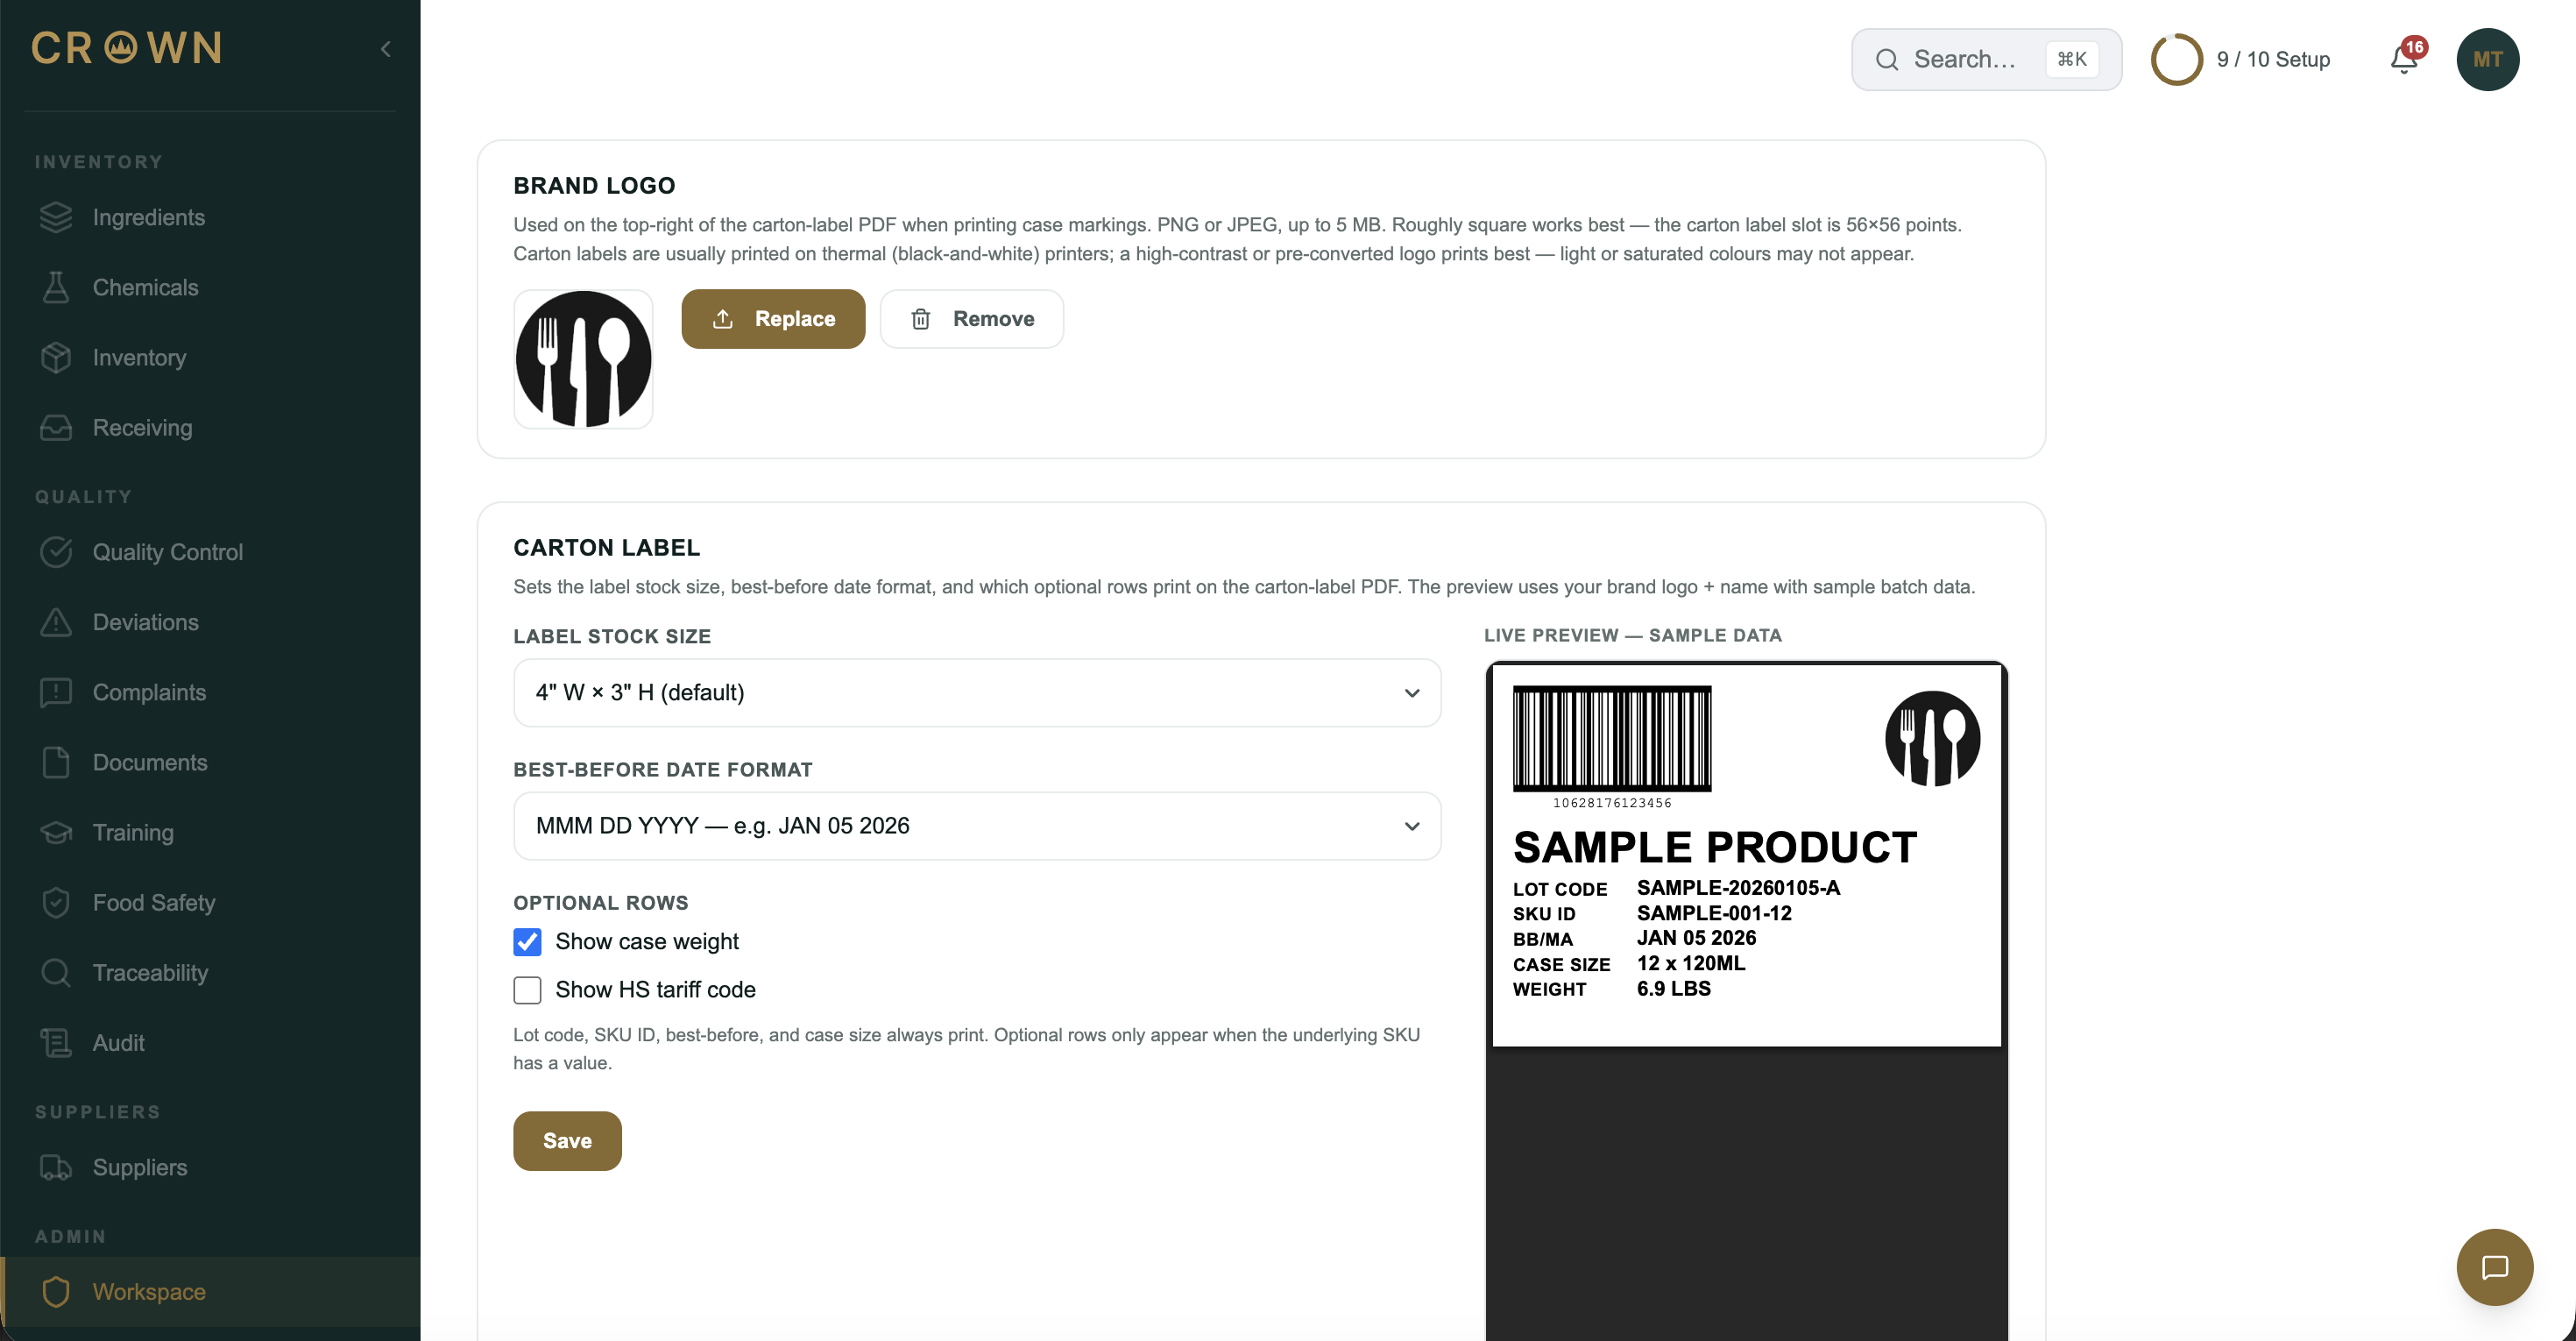
Carton label settings live in the Admin area, on the Company tab, in two adjacent sections: Brand logo and Carton label.
Choosing your label stock size
Label stock size sets the page size of every carton label you print:
- 4" W × 3" H: the default, a common small label stock.
- 4" W × 4" H: square stock, with more breathing room.
- 4" W × 6" H: the GS1 standard carton face size.
Sizes read width by height, so match the orientation of the label stock loaded in your printer, not just its dimensions.
Picking a best-before date format
Best-before date format controls how the date reads on every label:
- MMM DD YYYY: prints as JAN 05 2026. The default.
- DD MMM YYYY: prints as 05 JAN 2026.
- YYYY-MM-DD: prints as 2026-01-05.
Crown works out the date itself from the shelf life set on the product; this setting only changes how it's written. On the label it prints beside the bilingual BB/MA marking (best before / meilleur avant).
Optional rows
Every carton label prints the lot code, SKU ID, best-before date, and case size. Two more rows are up to you:
- Show case weight: on by default. Prints the case's shipping weight.
- Show HS tariff code: off by default. Prints the case's harmonized tariff code; worth turning on if your cases cross a border.
Both values come from each product's SKU details. On the Products page, open the product and fill in Case weight and HS tariff code on the SKU. An optional row only prints when its box is checked here and the SKU has a value, so a blank field never prints an empty row. See Creating a product for the rest of the SKU setup.
Adding your brand logo
The Brand logo section holds the logo that prints in the top-right corner of each label. Select Upload logo and choose a PNG or JPEG up to 5 MB. A roughly square logo works best, since the label reserves a small square slot for it.
You can swap the logo anytime with Replace, or remove it. Labels printed after removal simply leave the logo space empty.
Checking the live preview
The Carton label section shows a live preview beside the settings. It renders a real label using your logo and company name with sample batch data and a sample barcode, and it redraws as you change the stock size, date format, and optional rows. Confirm the layout matches your stock, then select Save.
Printing labels from a batch
Labels print from the batch itself, so each one carries that batch's real lot code and best-before date.
- Assign the batch's lot code
Crown assigns lot codes automatically when production completes, or you can select Assign Lot Code on the batch page to commit one early. Assigning early lets you print carton labels before pack-out wraps up; see Lot code format for how the code is built.
- Select Print Carton Label
Once the lot code is assigned, the Print Carton Label button appears at the top of the batch page. Choose the SKU you're casing up. Labels are per SKU because the case barcode, case size, and weight belong to the SKU.
- Print the label
A print-ready label opens in a new tab with the case barcode, lot code, best-before date, and case details, at the stock size you configured.
If a label doesn't look right
- A row is missing: optional rows print only when they're turned on in the Carton label settings and the SKU has a value. Check the product's SKU details for the case weight or HS tariff code.
- The best-before shows a dash: the product has no shelf life set. Add one on the product record and print again.
- The logo looks washed out: thermal stock prints in black and white. Upload a higher-contrast version, ideally dark artwork on a light background.
- No Print Carton Label button: the batch's lot code hasn't been assigned yet, so there's nothing to print.
- The button is greyed out: the product has no active SKUs. Add one on the Products page first.
What's next
Carton labels lean on two other pieces of setup: the lot code format that fills in the code on the label, and the products and SKUs that supply the case details.