Traceability
Receiving an ingredient shipment
How to log an ingredient delivery in Crown, create inventory lots, record inspection results, and attach supplier documents.
Receiving is how ingredient lots enter Crown. Each delivery you log creates one or more ingredient lots, the traceable units that move through your recipes and batches. Every lot has a code, a quantity, a supplier, and optionally an expiry date. Those records are the foundation of your traceability chain.
Before you start
You need at least one supplier in Crown before you can save a receiving record. If you haven't added your supplier yet, you can create one inline during the receiving flow, but adding suppliers in advance at Suppliers in the main menu gives you time to fill in qualification details properly.
Your ingredients should also exist in your catalogue before receiving. If an ingredient isn't registered yet, you can create it inline from the receiving form, but it will be created with minimal setup, so return to the ingredient afterwards to add measurement type, allergen profile, and storage settings.
Creating a receiving record
Navigate to Receiving in the main menu. The receiving form is a full page (not a drawer) and covers an entire delivery: one receipt, multiple ingredients.
Header fields
- Select the supplier
Search for the supplier from your registered list. If the supplier isn't in Crown yet, type their name and create them inline; they'll be saved with a Pending status you can update later from the Suppliers section.
- Enter delivery details
Add the Invoice or PO number, date ordered, and date received. These fields are optional but useful for reconciling records against purchase orders. Add carrier and tracking number if you want to retain shipping details on the receipt.
- Add shipping and tax if needed
Enter shipping and tax for cost tracking. Crown calculates the invoice subtotal from your line items and shows it alongside a running total on the receipt. Both optional; skip if you don't track ingredient costs in Crown.
Adding line items
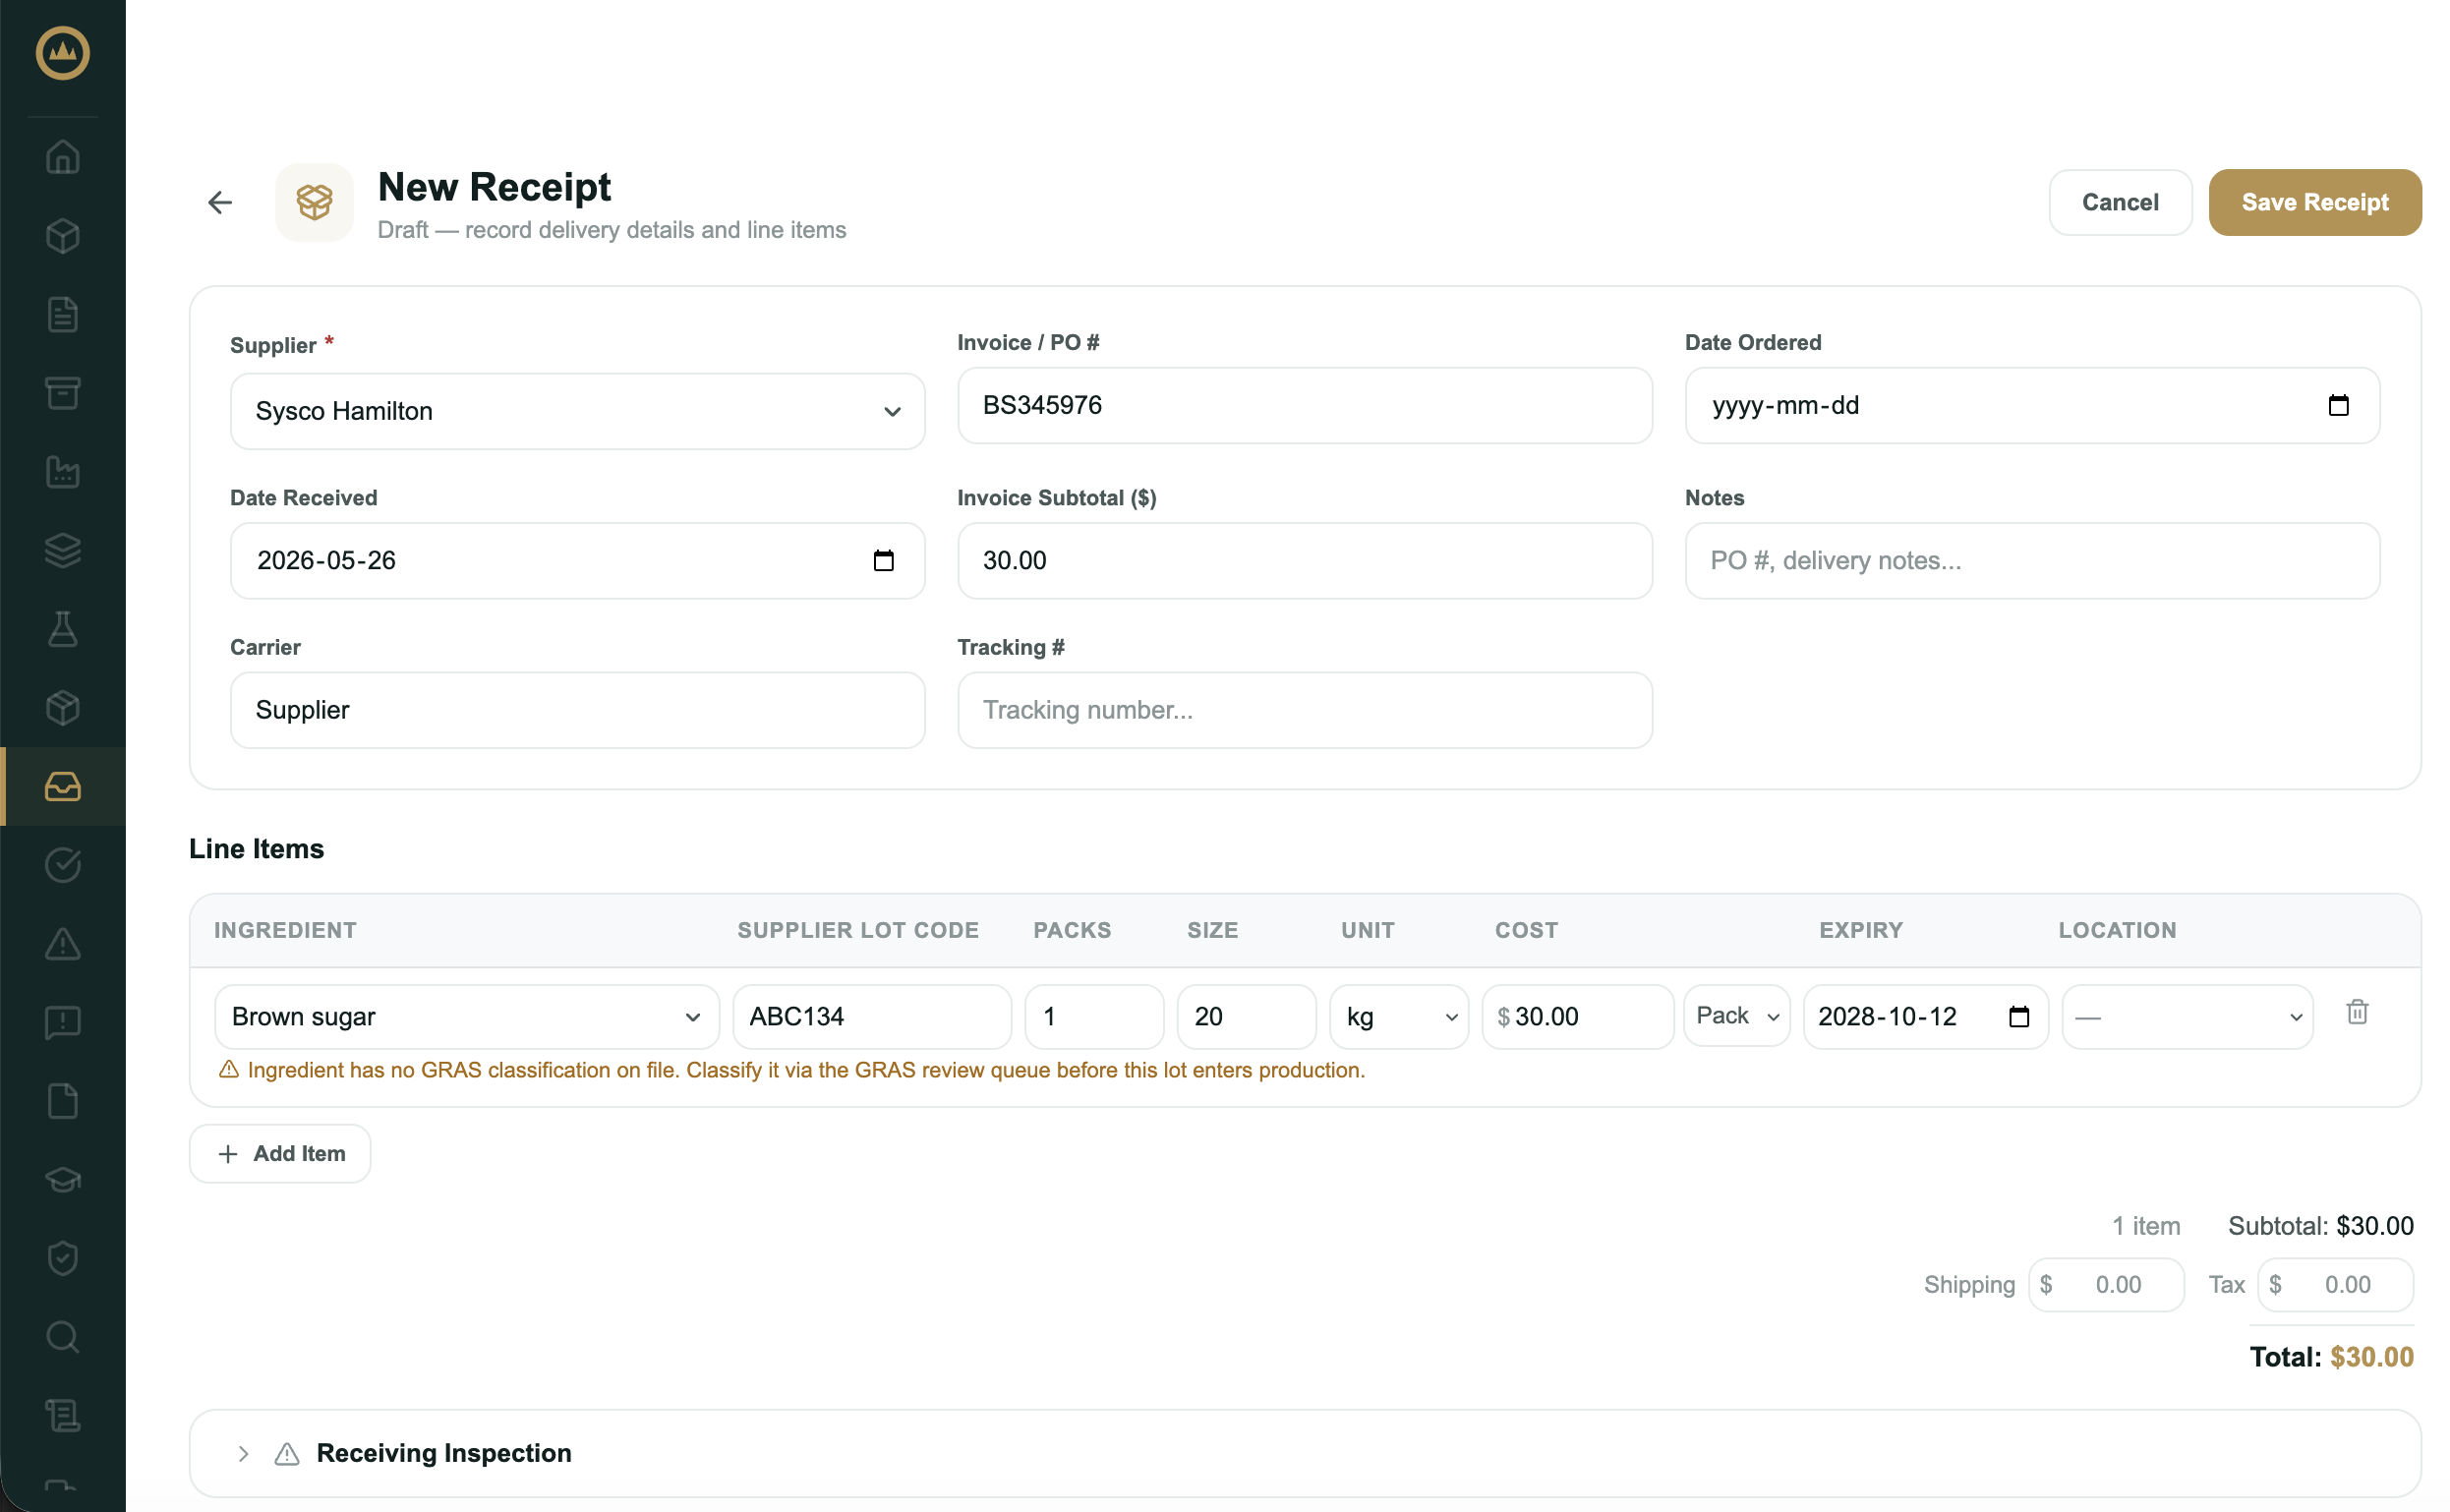
Each ingredient in the delivery is a line item. Add a row for each:
Ingredient: search your catalogue or type to create a new ingredient inline. Each ingredient needs its own row, so if you received two different ingredients, add two rows.
Supplier Lot Code: enter the lot code from the supplier's
label or documentation. Leave it blank and Crown auto-assigns a
reference in the format {receipt number}-L{line number}
(e.g. RCV-20260522-003-L1).
Packs and Size: enter the number of packs received and the size of each pack. Crown calculates quantity from packs × size. If you received a single bulk quantity, enter 1 pack and the total quantity as the size.
Unit: scoped to the ingredient's measurement family (mass, volume, or count). Defaults to the ingredient's default unit.
Expiry: enter the expiry date from the supplier's label or documentation. If you leave it blank and the ingredient has a shelf life configured, Crown defaults the lot's expiry to the received date plus that shelf life. A date you enter here always takes precedence.
Location: optionally assign the lot to a storage zone in your facility. Uses your registered facility zones.
Cost: enter unit cost or pack cost for ingredient cost tracking. Optional.
Receiving inspection
A collapsible Receiving Inspection section sits below the line items. Record whether the delivery passed or failed inspection with a single Pass/Fail toggle. The inspection prompt is: "Packaging intact, no damage or contamination?"
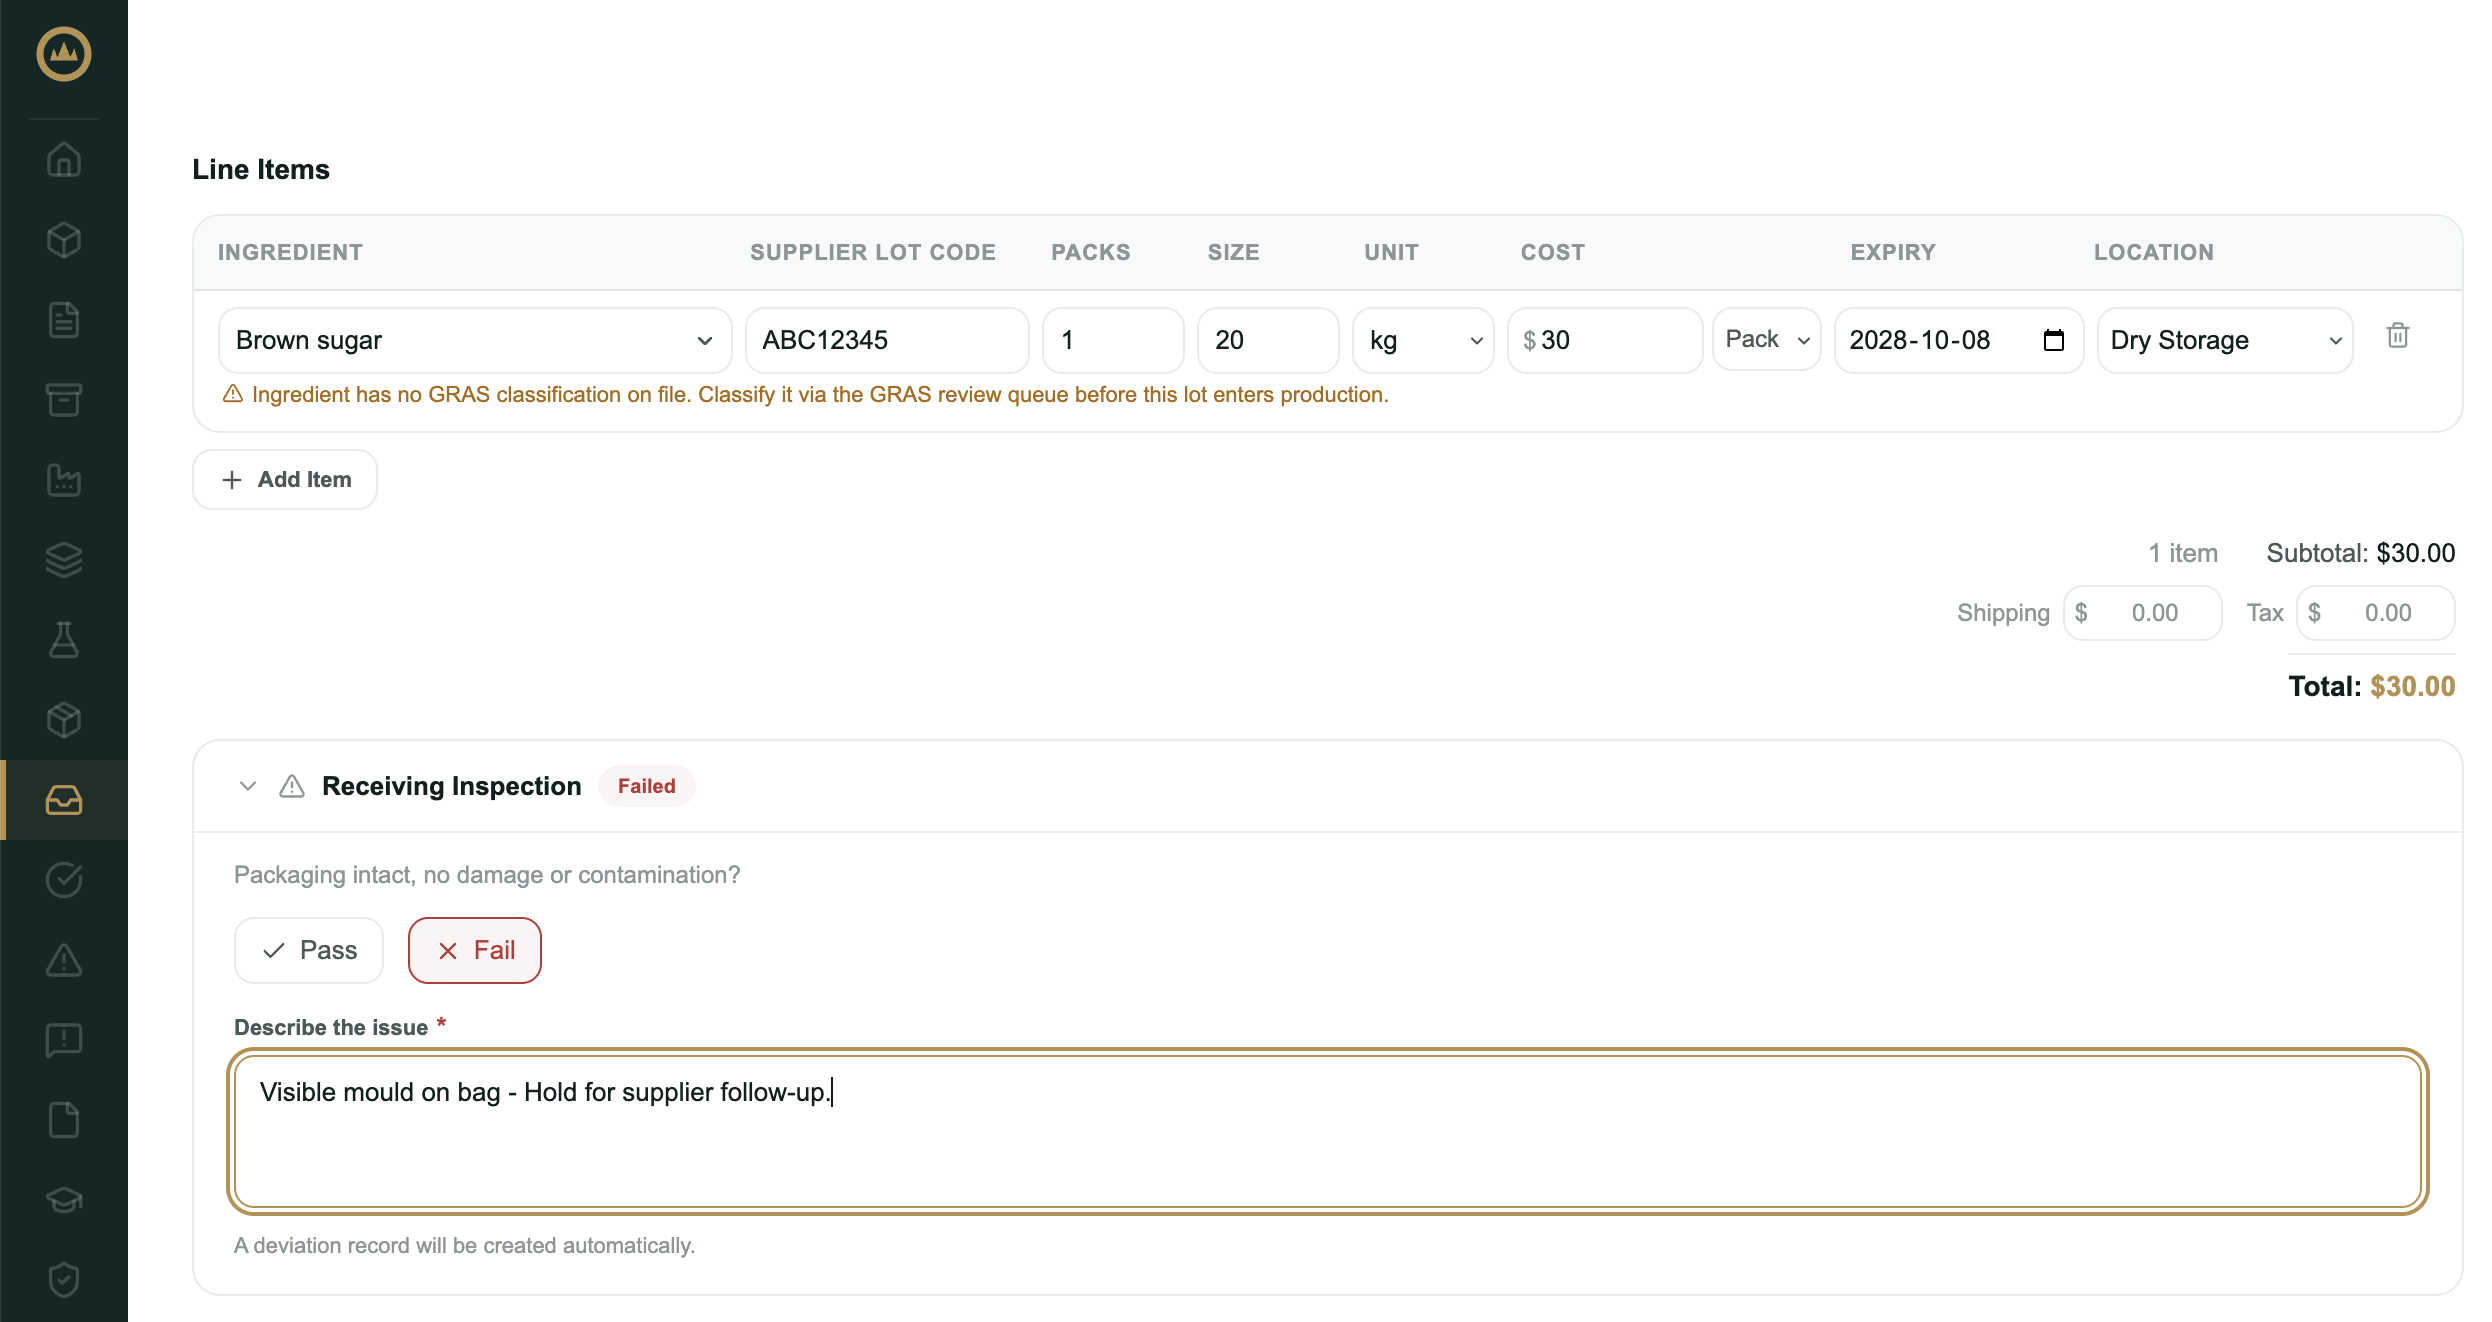
If you're not inspecting at the time of receiving (if inspection happens separately after the delivery is put away), leave the inspection section at Pending and update it later.
Attaching receipt documents
An Attachments section at the bottom of the form accepts invoices, packing slips, and other delivery-level documents (PDF, JPG, PNG, HEIC, DOC, DOCX, XLSX; 20 MB per file). These attach to the receipt record itself.
After saving
Saving the receipt creates one ingredient lot per line item. Each lot is immediately available in your inventory and in the batch lot picker.
The exception is a repeat delivery of the same supplier lot: when a line matches an existing lot's ingredient, supplier, and supplier lot code, Crown adds the received quantity to that lot instead of creating a new one, and an expiry date on the new delivery refreshes the lot's expiry. This keeps one traceable inventory record per physical supplier lot. The same lot code from a different supplier still gets its own lot.
Lots appear in two places:
- Inventory → Raw Materials: a list of all ingredient lots with on-hand quantity, storage location, expiry status, and any hold flags
- The ingredient record: an Active lots section in the ingredient drawer showing current lots for that ingredient
Quantity decrements automatically as lots are consumed in batches, adjusted, or recorded as waste. You don't need to update inventory manually.
Attaching COAs
Certificates of Analysis attach to the lot, not the receipt. This is deliberate: a single COA from a supplier often covers multiple receipts of the same lot, so it's anchored to the lot rather than a specific delivery event.
To attach a COA after receiving:
- Navigate to Inventory → Raw Materials
Find the ingredient in the list and expand it to see the lot rows.
- Open the lot detail
Click the lot to open its detail drawer.
- Attach the COA
Use the attachments section in the lot drawer to add the COA. The same file types are accepted as on the receipt.
Placing a lot on hold
Crown places a lot on hold automatically when its receiving inspection is failed (see above). You can also place a hold by hand at any time — if a lot arrives with quality concerns, or if an issue surfaces after it's been received — from the inventory lot drawer. Enter a hold reason when prompted.
Editing a receiving record
Receiving records can be edited after saving, with different levels of ceremony depending on what's being changed:
Always editable: receipt notes, carrier, tracking number, invoice/PO reference, the received and ordered dates, and the shipping and tax amounts can be updated at any time without additional steps.
Amend with reason: inspection outcome, inspection notes, and line-item cost fields can be changed through an Amend action that records the reason and preserves the amendment history.
Line correction: per-line quantity, unit, and similar fields can be corrected only when the lot has not yet been consumed in a batch, adjusted in inventory, or recorded as waste. Once a lot has downstream use, its source line is locked. Use the Notes field to document the discrepancy instead.
Open the receipt from the receiving list to access the detail drawer where all edit actions are available.